Archive for October, 2015
Alfa Romeo Crosswagon Q4 seat heating r&r
Here is a little post about how to repair OEM seat heating on Alfa Romeo Crosswagon Q4(same system may be present on other cars from Alfa Romeo from the same generation).
From the first hours of use(second hand vehicle) I noticed that the heating could not be felt on the right seat although the LED for ON operation was lit.
The driver’s seat was also a lazy heater, in winter time sometimes temperature drops to -20 Celsius, for sure you want your heating systems up’n’ready!
Here is a nice pic of the this car going off-road(me driving) in a beautiful winter landscape a few years ago(it has full time 4×4 transmission with a Torsen C center differential with dual locking stage and open rear/front differentials assisted by ASR) :
Here is the schematic of the seat heating, it is a simple system with 2 heating elements working in series, 1 thermostat and a pushbutton, a red LED is used to signal the ON state together with a small series resistor(located in the LED cable) .
A lot of users have non-operational seat heating systems because on these cars they are prone to fail but in fact the repair is always easy and cheap, making what is called a DIY job, you rarely see a broken heating element because they are pretty much protected by the leather of the seat and heating elements are solid as much as I could see.
Source no.1 of trouble(LED does not lit, heating doesn’t work) is the push-button, that is an easy fix, if the fuses are ok and the voltage is present under the seat and by pushing the ON button the heating does not work and the red LED near the seat does not lit than you must replace the button, no problems with that, easy job.
Source no.2 of trouble(LED is lit but heating doesn’t work) is the thermostatic element in the seat itself which is an old fashion bi-metal thermostat like the one in your electric boiler which opens its contact on a preset temperature, in our case I didn’t know which was the original temp setting and I am not curious about that, anyway it was not good if you ask me, never had really good heating in these seats but I suppose it was around 50 Celsius, decided to replace them with 70 Celsius new ones because the originals were burnt and they always failed to provide decent heating in cold seasons if they (ever) worked.
By using these new parts I am avoiding switching as much as possible, and if further control is necessary I will add PWM buttons replacing the original ones, using the 70 Celsius thermostat as a safety device, all new heating systems are built that way.
So here is the original thermostatic element, to find it you must take out the seat from the car and uncover a little the heating element of the seat in the back side of it, an ugly but not so hard to do it job because those metal rings that hold the leather to the seat are pretty strong, didn’t refit them, just used plastic ties on reassembly because everybody does that nowadays, plastic engineers are everywhere around and they just didn’t mentioned quitting yet 🙂 :
The original thermostat measured high impedance, and goes in it’s final place, the dumpster.
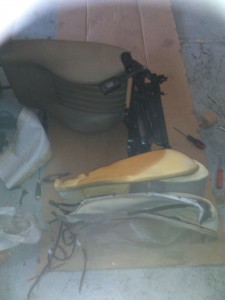
Here is the disassembled seat:
Here it goes the new thermostat:
Finally the system was tested and the wires were at last routed the good way in there, it was an Italian mess under my seat in the car:
Now that’s heating for 2 euros (one little Chinese thermostat 🙂 )!


